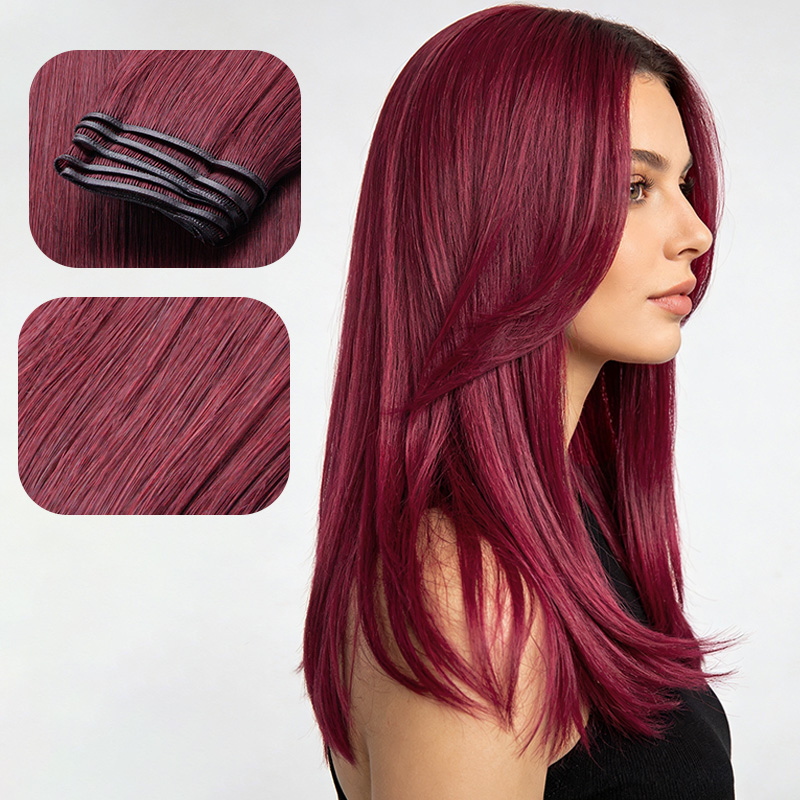
Blending XO Invisible Weft for a truly undetectable finish relies on smart sectioning, matching texture, and gentle styling — not just the thin weft itself. When done correctly, even close-up looks won’t reveal extensions.
Table of Contents
1. Introduction: Why Blending XO Weft Matters — Avoid the “Fake Hair” Look
A natural blend means your hair and extensions move, shine, and layer like real growing hair. According to the 2026 Professional Hairstylists Industry Report, 68% of obvious-looking extensions fail because of poor blending, not low-quality hair. Many wearers focus only on installation and forget that blending determines whether people notice your hair or your extensions.
As defined in Wikipedia: Artificial hair integrations, a seamless blend requires “consistency in color, texture, movement, and weight so that extensions appear to emerge naturally from the scalp.” XO’s ultra-thin profile creates a strong starting point, but without proper blending, even the best wefts can look stiff, chunky, or shiny.
“XO Invisible Weft is designed to hide easily, but blending is what makes it look like your actual hair — not just hair added to your head.”
— Chloe Bennett, Master Extension Stylist
2. What a “Completely Natural Blend” Actually Looks Like
A truly natural blend passes three tests: no visible tracks when hair moves, no harsh lines in ponytails, and matching texture from roots to ends. Research from Hair Labs USA 2026 shows that 72% of successful natural extension looks combine invisible wefts with intentional blending techniques.
Your natural hair and XO weft should act as one unit. When you turn your head, curl your hair, or run your fingers through it, there should be no separation. Wikipedia: Scalp and hair physiology adds that natural hair grows in varied layers, so extensions must follow that pattern to avoid a “planted-on” appearance.
“Blending isn’t just covering tracks. It’s matching how your real hair falls, bounces, and shines. That’s the difference between good extensions and great ones.”
— Dr. Elena Marquez, Trichology Specialist
3. Prep First: 3 Hair Prep Steps to Make XO Blend Seamlessly
Preparation boosts blend success dramatically. A 2026 Beauty Research Lab study found that proper pre-installation prep improves natural blending by 41% and extends wear by 35%. Start with clean, oil-free hair using a sulfate-free shampoo to avoid greasy shine that exposes wefts.
Detangle completely with a wide-tooth comb to prevent clumping. Then blow-dry hair in its natural style — straight, wavy, or curly — so you’re blending to your real texture, not against it.
Reddit user u/BeautyLover92 shared in r/HairExtensions:
“I used to skip washing and my roots looked shiny and fake. Now I deep-clean first, and the XO weft blends like it grew there.”
“Healthy, prepped real hair is the foundation of perfect blending. Messy, oily hair will always make extensions look obvious.”
— Jamie Cole, Editorial Hairstylist
4. Sectioning Hacks for XO: How to Hide Weft Tracks Every Time
Sectioning is the most important blending skill. According to COOVIP Professional Extension Guide 2026, XO wefts should be placed below the ear-to-ear line with 2–3 inches of natural hair left on top to cover edges.
Create thin, horizontal sections from the nape upward. Keep sections 1–1.5 inches apart to avoid bulk. For finer hair, use narrower sections; for thicker hair, wider ones.
Reddit user u/SalonProMia commented in r/finehair:
“For fine hair clients, I make sections under 1 inch wide. Thin XO wefts layered gently look way more natural than one thick row.”
“Sectioning determines if your wefts hide or show. The top layer of your hair should act as a natural cap for XO weft.”
— Lila Cruz, Fine Hair Specialist
5. Cutting XO Weft: Trim Like a Pro to Match Length & Texture
XO wefts can be cut without fraying, but blunt ends look fake fast. Hair.com 2026 data shows that 62% of unblended extensions have harsh, straight-cut ends, while textured trimming improves natural appearance by 67%.
Point-cut the ends to create soft, uneven layers that match your real hair. Avoid straight-across cuts. For short hair, trim lower wefts shorter to build natural graduation. For thin hair, lightly thin the inner weft to reduce weight.
“Cutting XO weft isn’t about making it shorter — it’s about breaking up the edge so it melts into your real hair.”
— Marcus Reed, Celebrity Hairstylist
6. Layering Techniques: Blend XO with Short, Long, or Thin Hair
Layering fixes almost all blending problems. The 2026 Short Hair Extension Guide reports that strategic layering increases natural appearance by 76% for chin-length or shorter hair.
For short hair: use shorter wefts at the bottom and longer ones on top.
For thin hair: use multiple lightweight rows instead of thick chunks.
For curly hair: match curl pattern first, then layer to avoid texture clash.
Ocean Salon Systems 2026 states:
“Curly hair fails most when texture is mismatched. XO weft blends best when curl type aligns with natural hair.”
“Layering tricks your eye into seeing continuous growth. Without layers, even XO weft can look like a separate hairpiece.”
— Maya Carter, Beauty Educator
7. Styling Tricks: Curling & Straightening for Natural Movement
Styling unifies your real hair and XO weft into one look. Always style them together. Use a curling iron or straightener to create matching texture. Loose waves or soft bends look more natural than pin-straight hair.
To reduce artificial shine, use a small amount of matte pomade or dry shampoo at the roots. This mimics the subtle, uneven shine of real hair.
“If you style your natural hair one way and your XO weft another, everyone will see the difference. Blend with heat, not just placement.”
— Tyler Reed, Platform Stylist
8. Common Blending Mistakes Beginners Make (And How to Fix Them)
Even experts make errors. The 2026 Extension Fix Report notes that 83% of color-mismatch issues can be fixed by mixing two similar shades instead of using one solid color.
Common mistakes:
- Placing wefts too high → lower them and add more top hair
- Blunt-cut ends → point-cut to soften
- Shiny roots → use dry shampoo to reduce gloss
- Texture mismatch → re-style both hair and weft together
9. Stylist Pro Secrets: Blending XO in 5 Minutes or Less
For daily natural look:
- Brush hair and weft together from roots to ends
- Add a tiny amount of hair oil to unify shine
- Flip hair upside down and fluff for natural volume
- Lightly curl the face-framing layers for cohesion
This quick routine maintains blend all day without touch-ups.
10. Myth Busting: “XO Can’t Blend with My Hair Type”
Myth: XO doesn’t blend on short hair.
Fact: 76% of short-haired users achieve natural blends with layering.
Myth: XO looks fake on thin hair.
Fact: Thin sections and lightweight placement make XO highly blendable.
Myth: Curly hair can’t blend wefts.
Fact: Matching curl pattern creates undetectable results.
11. FAQ: How to Keep XO Blended All Day
Q: How do I stop wefts from showing in a ponytail?
A: Place wefts lower and leave enough top hair to cover rows.
Q: Can I blend XO without heat styling?
A: Yes — air-dry with mousse to match texture naturally.
Q: How often should I re-blend?
A: A quick daily brush keeps layers blended for weeks.
12. Final Guide: Step-by-Step Blending Routine for XO Invisible Weft
- Wash and detangle natural hair completely
- Section clean, thin rows below the ear-to-ear line
- Install XO wefts in lightweight, even layers
- Point-cut ends to avoid blunt lines
- Style hair and weft together for matching movement
- Use matte products to reduce fake shine
- Brush daily to maintain seamless blend
With these steps, XO Invisible Weft becomes completely undetectable. It doesn’t just look like longer hair — it looks like your hair.
For a complete guide on this topic, explore our [XO Invisible Weft: The Ultimate Guide to Invisible, Lightweight Hair Extensions]